P2P Sync
OpenSRP supports device-to-device syncing through an additional library. To add the P2P library use p2p-lib = "XXX-SNAPSHOT in your libs.version.toml file. After this sync your application to update the added library.
Enabling P2P sync configuration
To enable P2P sync we need to make changes to enable viewing P2P UI elements and configure what to sync over P2P.
Example P2P configuration
{
    "id": "p2p_sync",
    "visible": true,
    "display": "Transfer Data",
    "menuIconConfig": {
        "type": "local",
        "reference": "ic_p2p"
    },
    "actions": [
        {
            "trigger": "ON_CLICK",
            "workflow": "DEVICE_TO_DEVICE_SYNC",
            "id": "navigateToP2PScreen"
        }
    ]
}
Config properties of P2P sync
| Property | Description | Required | Default |
|---|---|---|---|
| id | uniquieId of your p2p_sync block | yes | |
| visible | Boolean to show whether this is to be shown | yes | apps |
| display | Title text that should be shown on the device | yes | |
| menuIconConfig | The icon to show. This can be configured through ICON configuration. See here | No | |
| actions | Action to be performed when once clicks on the display above. See actions parameters under questionnaire | yes |
info
DEVICE_TO_DEVICE_SYNC application workflow can be triggered via configurable actions as indicated in the sample navigation configuration above.
Resources to sync
You also need to define which resources to be synced. This configuration should be added as part of Application configuration
"deviceToDeviceSync": {
    "resourcesToSync": [
        "Group",
        "Patient",
        "CarePlan",
        "Task",
        "Encounter",
        "Observation",
        "Condition",
        "Questionnaire",
        "QuestionnaireResponse",
        "RelatedPerson",
        "Flag",
        "Immunization"
    ]
}
Example P2P sync workflow
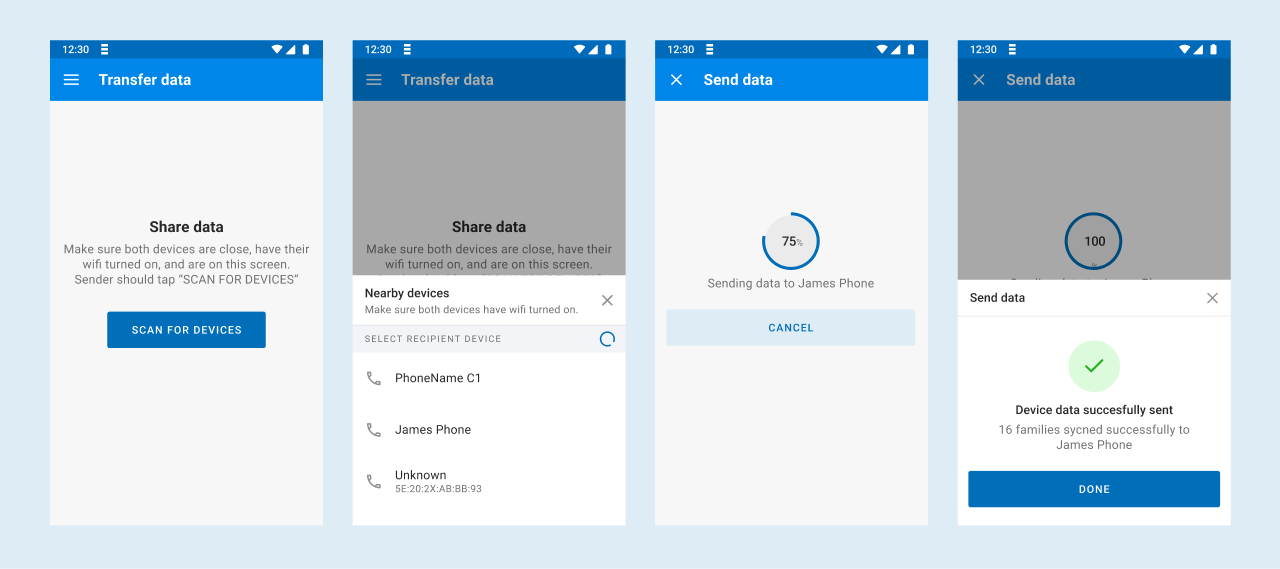
The workflow below shows an example of syncronzing data from device to device.
