Admin Dashboard Features
This guide outlines the steps to follow to manage Users, Care Team, Organization and Locations on OpenSRP. The platform is named FHIR Web and interacts with the Keycloak and HAPI FHIR servers.
Prerequisites
To navigate through this user guide, you are required to have admin access to the admin portal. In addition, you will need to understand how the different entities tie to each other. Below is a summary.
A user represents anyone who will interact with the FHIR SDK-based App or FHIR Web. A user is assigned permission through roles defined in Keycloak which maintains all user authentication. Keycloak defines permissions in the form of roles that can be assigned to a user based on the activities they are expected to carry out. Due to the long list of roles, FHIR Web presents the option to create user groups, which represent a collection of roles that can be assigned to a user.
A user who is expected to interact with the health workflows, is assigned to a care team. A care team is then assigned to an organization (also known as a team). The organization is then assigned to a location which is the lowest point in the hierarchy that a user is expected to interact in while fulfilling the health workflows. The steps laid out below ensure a user is able to interact with the
- Create/add the complete list of users
- Create the location hierarchy
- Create Organizations/teams
- Create Careteams
- Assign the Organization to a location which is the lowest point in the hierarchy that a user is expected to interact
- Assign the created careteam to the respective Organization
- Assign Users to the careteam
Access to Admin portal
- Access the OpenSRP 2 web portal through the url: a. Production - https://web.ProjectName-production.smartregister.org/ b. Preview/training - https://web.ProjectName-preview.smartregister.org/
- This will load the login page as shown below.
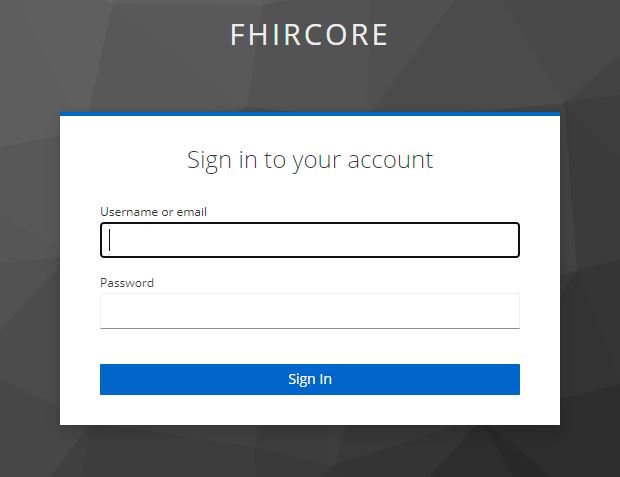
- Enter your login credentials (Username and Password) and click ‘Sign in’. A landing page will appear as shown below.
- The landing page has the following features
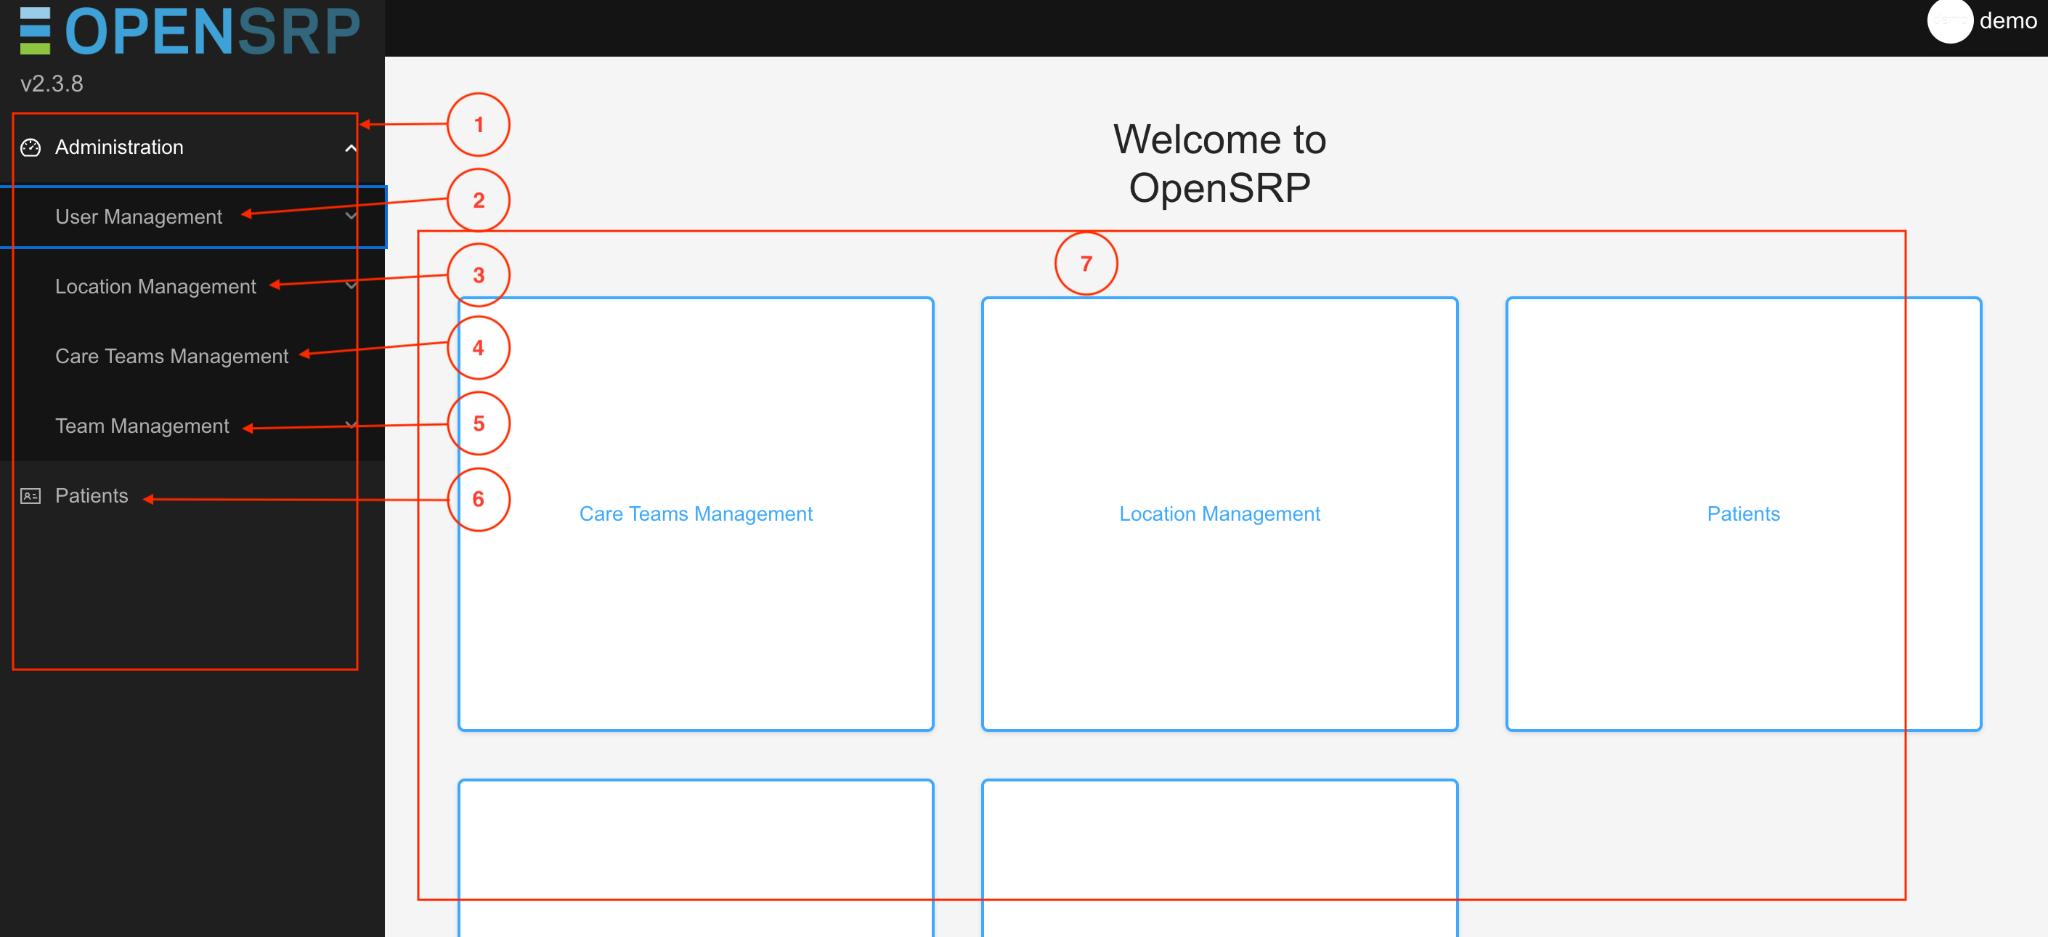
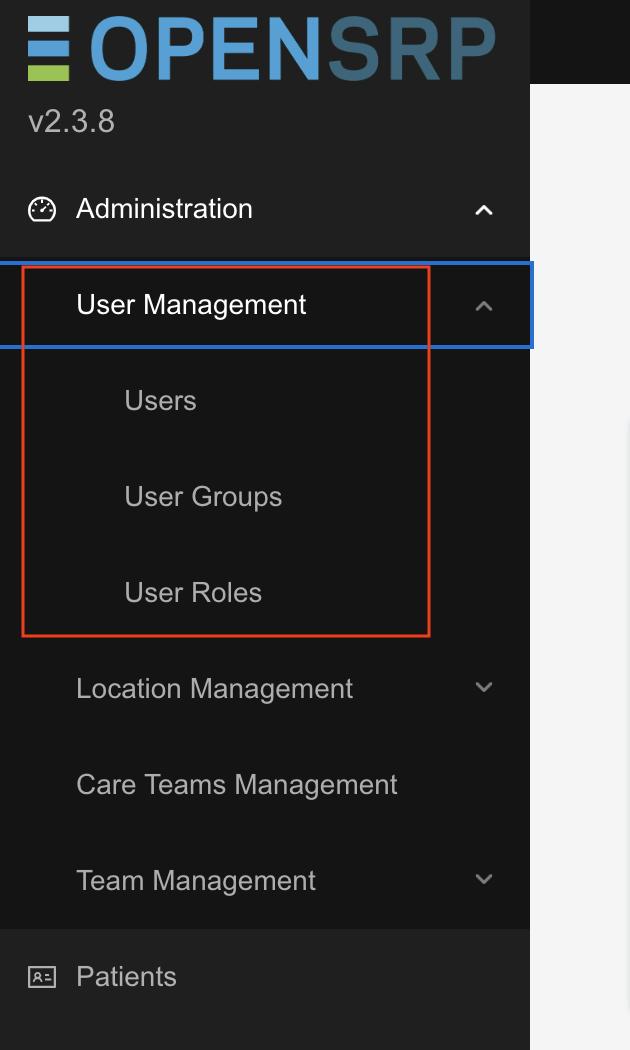
- Side menu: A collection of menus that facilitate the user to conduct management activities.
- Users Management: allows you to manage users, user groups and user roles
- Locations Management: allows you to manage location units and location unit groups
- Care Teams Management: helps the users create CareTeam to be used to administer the different services in the FHIR Core apps.
- Team Management: helps the users create teams (organization) to be used to administer the different services in the FHIR Core apps.
- Patients Management: helps the users to view the patient registered on App and synced to the server.
- Main landing page: has shortcuts to the side menu items.
User Management
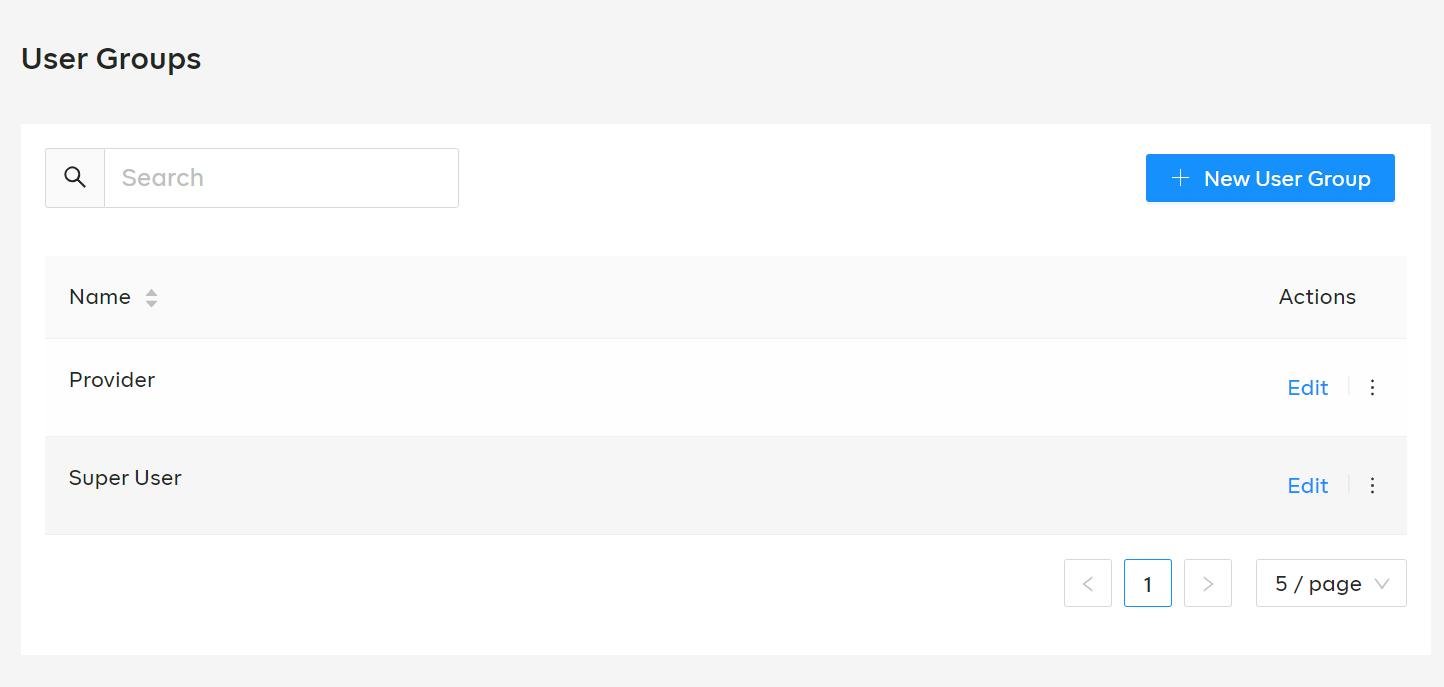
The OpenSRP web provides the ability to create users, user groups and assign users to user groups. User groups allows categorization of users with common user roles, by default there are two user groups; Provider user group which refers to clinicians whose main role is to collect immunization data on the mobile application while the Super User group refers to users who have all the privileges such as managing users, teams and locations.
How to create a user group
- Click on the ‘User group ’ menu item or on the main landing page
- This will load a page with a list of existing user groups.
- Click on the ‘New user group’ button on the top right side of the screen.
- This will load a form that allows you to enter the user group name.
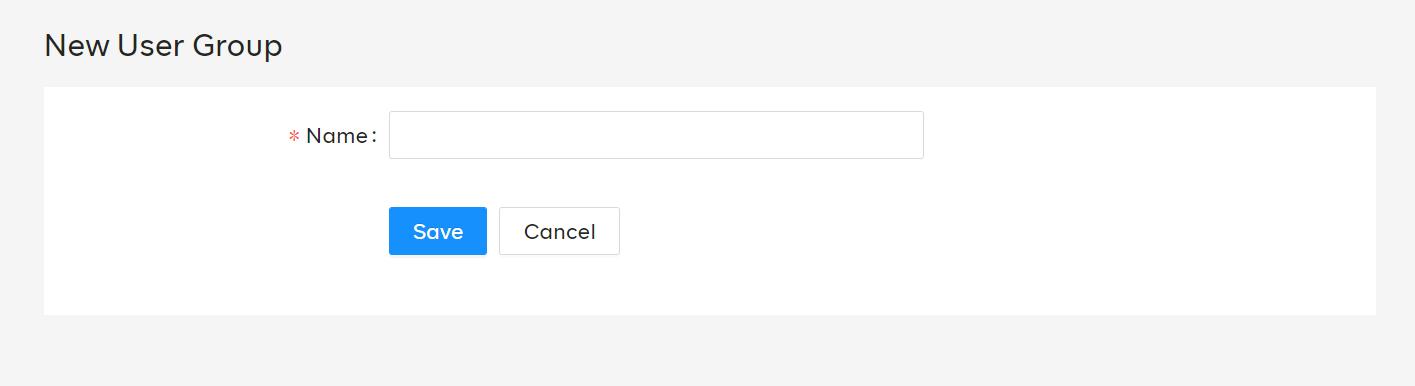
Fields with Asterisks are a must to fill. 5. Click ‘Save.
To complete the process of creation of the user group, you will need to assign user roles. To do this, follow the steps below
How to assign/unassign roles
- Click on the ‘User group ’ menu item or on the main landing page
- This will load a page with a list of existing user groups.

- Click on the ‘Edit’ link.
- This will load a screen that allows you to assign roles to the user group. The screen has the following sections a. Lists the available roles b. Lists the selected roles to be assigned. c. Lists the roles already assigned.
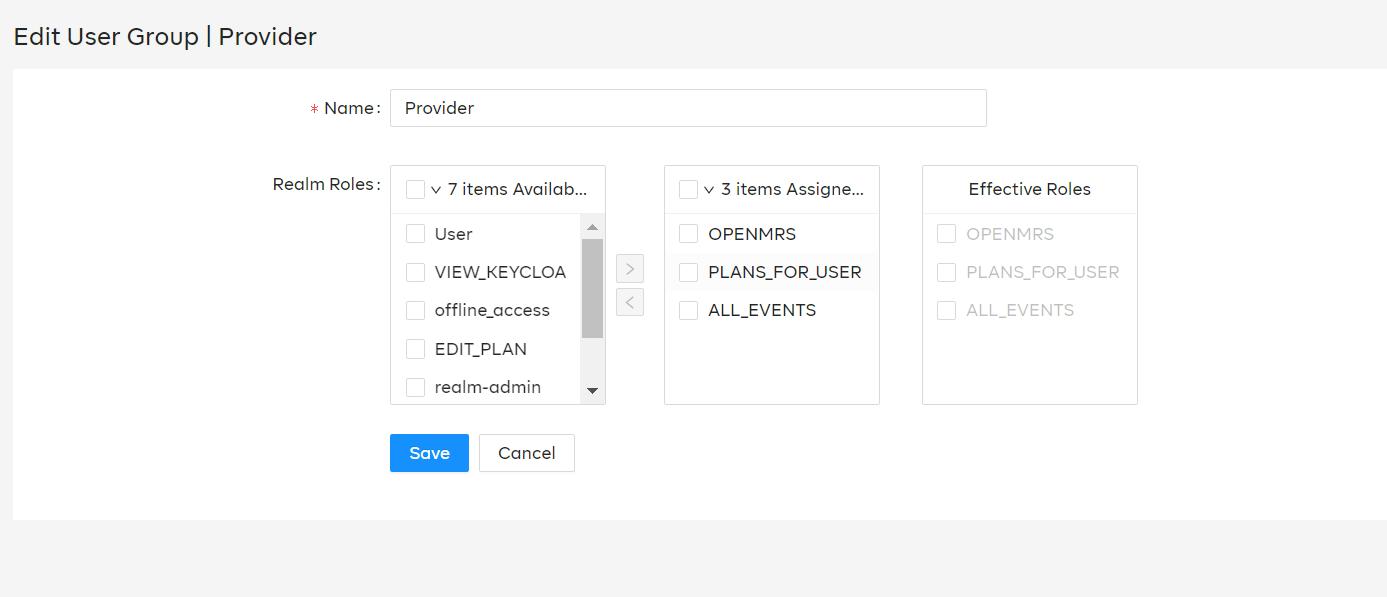
- To assign a user role, tick the box next to the preferred user roles, click on the button with an arrow pointing to the right .This will update section 2 with the selected roles. Then click ‘save’ to effect the changes.
- To un-assign roles from the user group tick the box next to the roles to be unassigned then click on the button with an arrow pointing to the left, then click ‘save’.
How to create a user
- Click on the ‘User Management ’ menu item or on the main landing page
- This will load a page with a list of existing users.

- Click on the ‘Add user’ button on the top right of the screen.
- This will load a form that allows you to enter the user details. Fields with Asterisks are a must to fill.
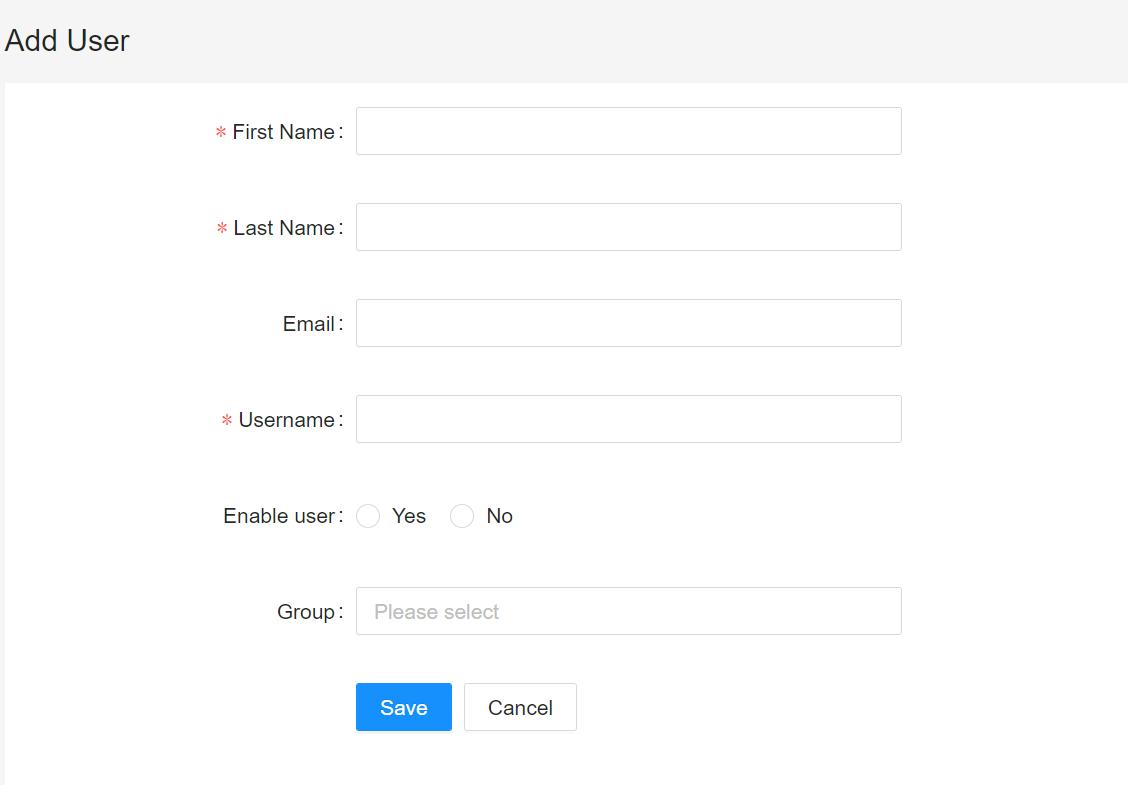
- To assign the user to a particular user group, click on the ‘Group’ field and select the user groups.
- Click ‘Save.
- You will then need to create credentials for the created user, to do this click on the three dots located beside a particular user.

- Click on ‘Credentials’ link from the pop up.
- Enter the user credentials on the form that appears
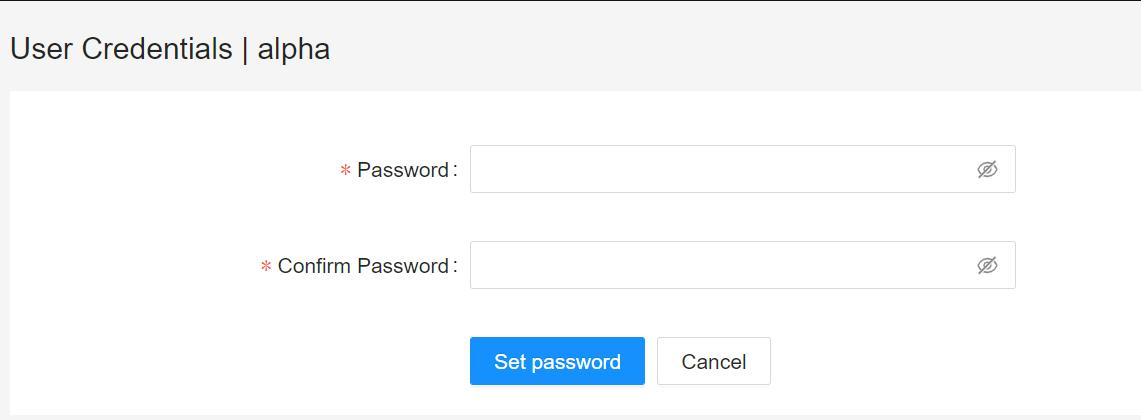
- Click ‘set password’
How to update user’s detail
- Click on the ‘User management’ menu item or on the main landing page
- This will load a page with a list of existing Users.

- Click on the ‘Edit’ link on the particular user you would like to update.
- This will load a form that allows you to update the user’s details. Fields with Asterisks are a must to fill.
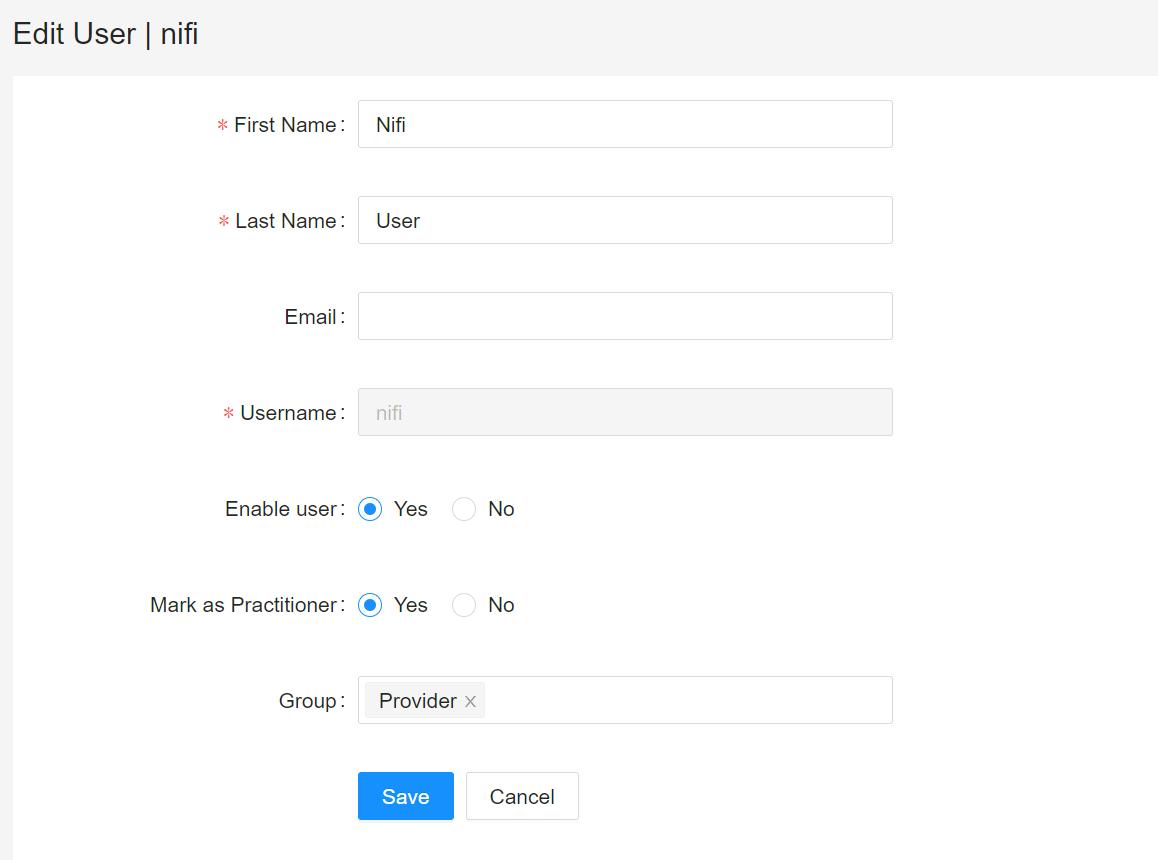
- Click ‘Save.
Location Management
This piece of functionality helps the users create locations and add any parent locations for each location. This package is based on the location resource in FHIR. A location hierarchy is defined by assigning parent locations. If a parent is not selected then the location is taken as a root location in the hierarchy.
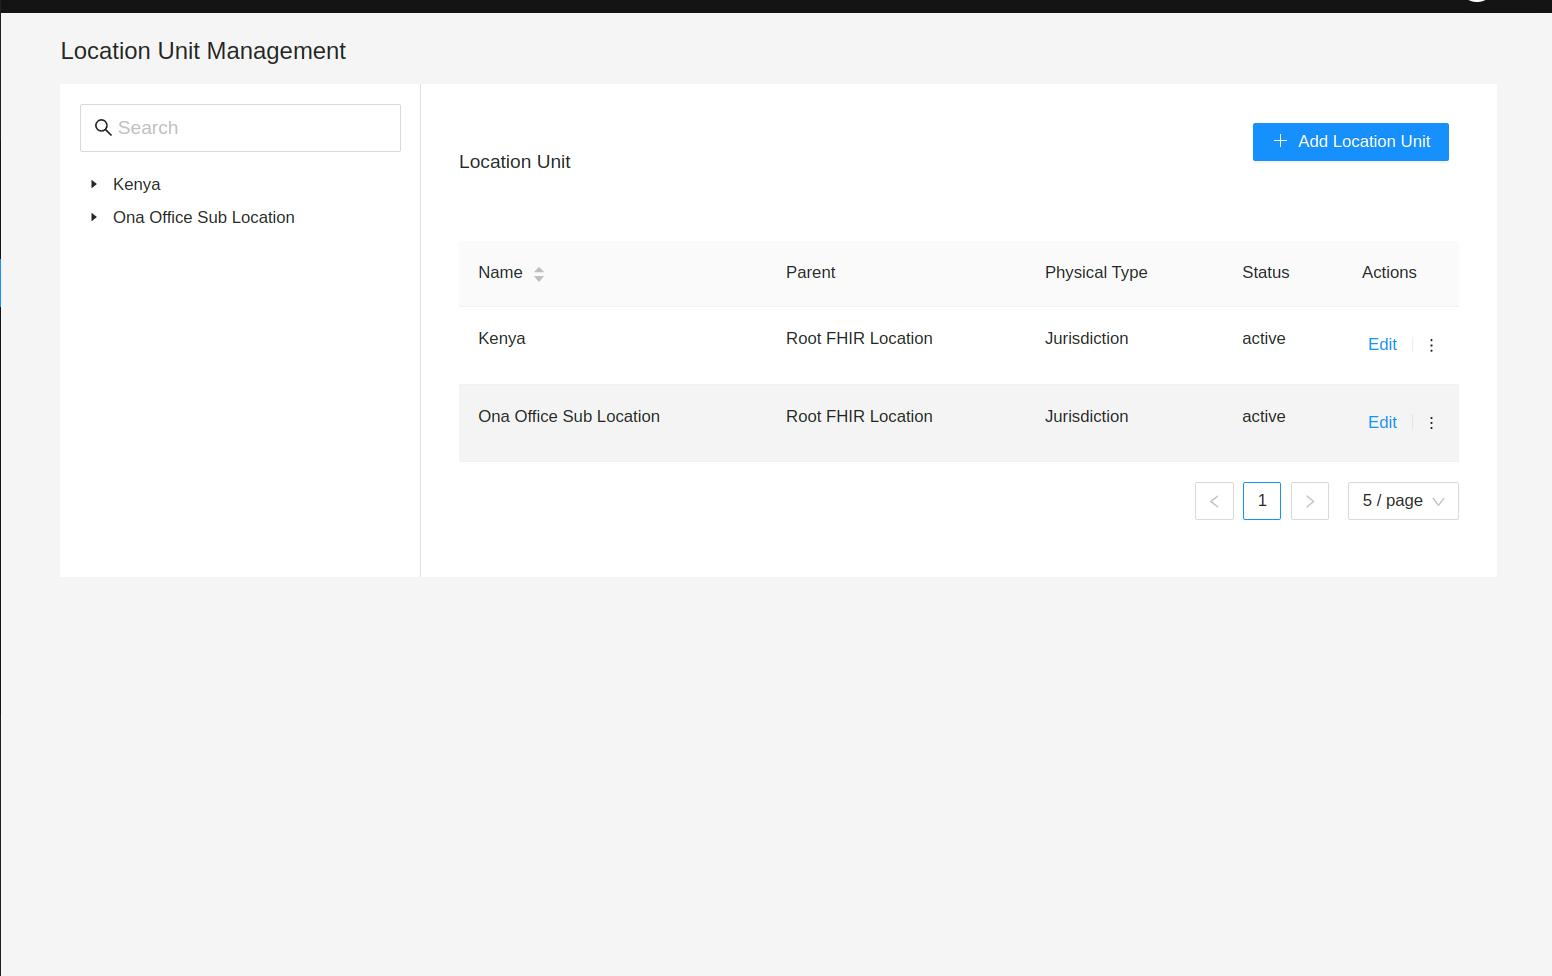
How to create a Location unit
You can access this page by clicking on the location management menu on the sidebar then, clicking on the location unit menu. This will load a page with a list of existing location units.s. Below is a sample of how the page would look like.
- Click on the ‘Add location Unit’ button on the top right of the screen.
- This will load a form that allows you to enter the location unit details. The fields are described as follows. Fields with Asterisks are a must to fill.
- Click ‘Save.
How to update a Location unit
You can access this page by clicking on the location management menu on the sidebar then, click on the location unit menu. This will load a page with a list of existing location units.s. Below is a sample of how the page would look like.
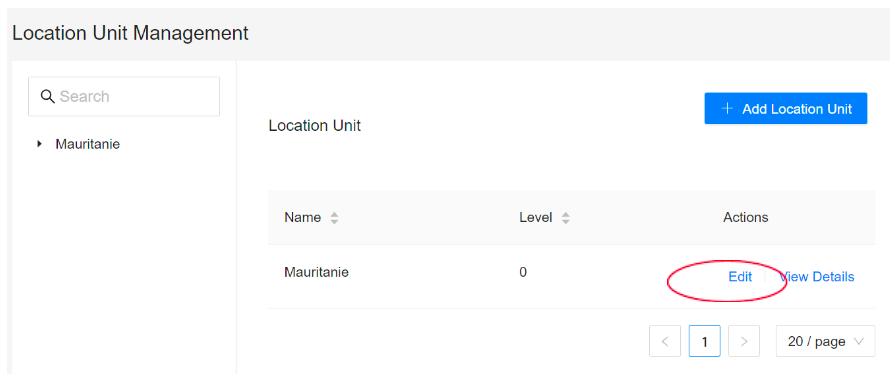
- Click on the ‘Edit’ link.
- This will load a form that allows you to update the location unit group details. Fields with Asterisks are a must to fill.
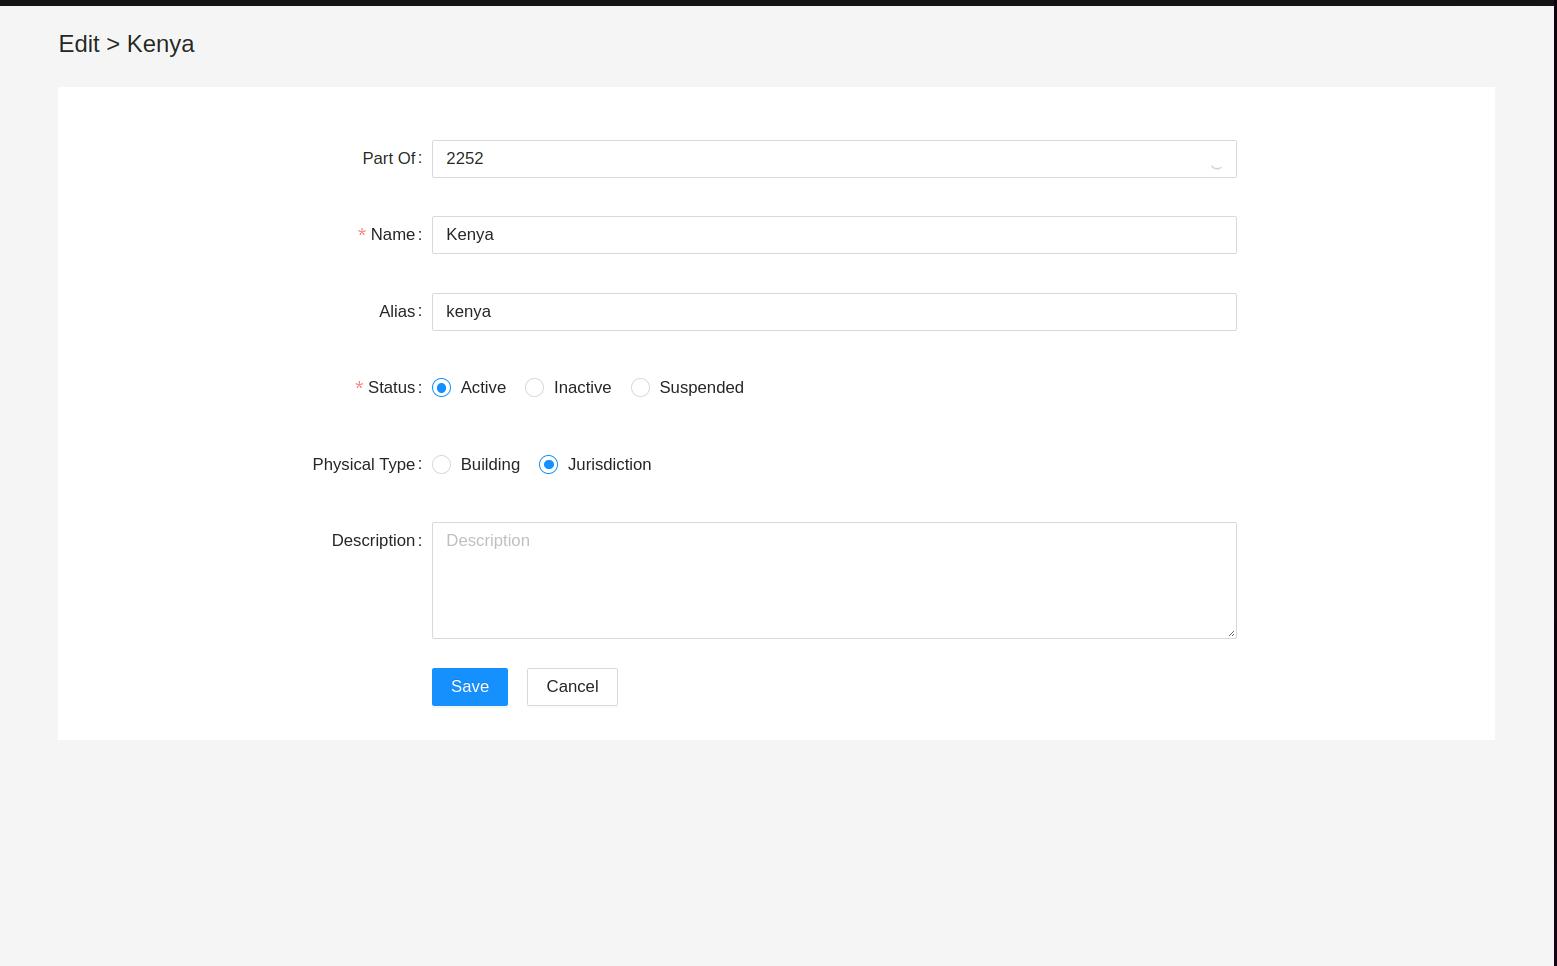
- Click ‘Save.
Care Team Management
This piece of functionality helps the users create CareTeam to be used to administer the different services in the FHIR Core apps.
- This package also allows the different practitioners to be added to the CareTeam
- This package also allows the different groups to be added to the CareTeam
How to update a Care Team unit
You can access this page by clicking on the Care Team management menu on the sidebar. This will load a page with a list of existing CareTeam. Below is a sample of how the page would look like.
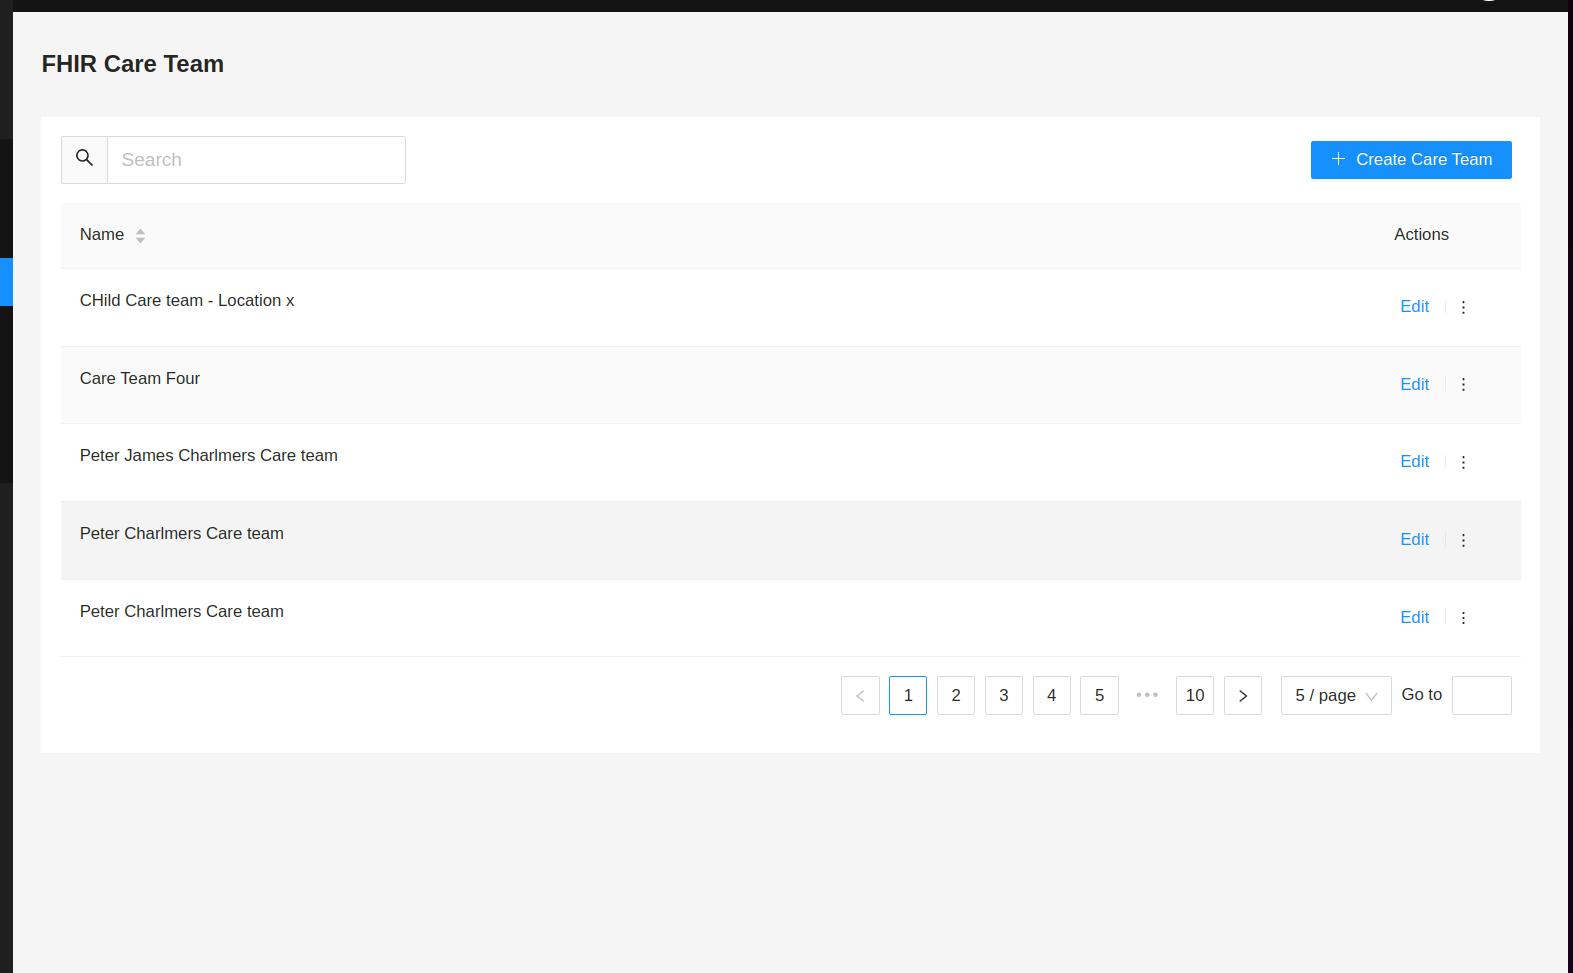
- Click on the ‘Create CareTeam’ button on the top right of the screen.
- This will load a form that allows you to enter the CareTeam’s details. Fields with Asterisks are a must to fill.
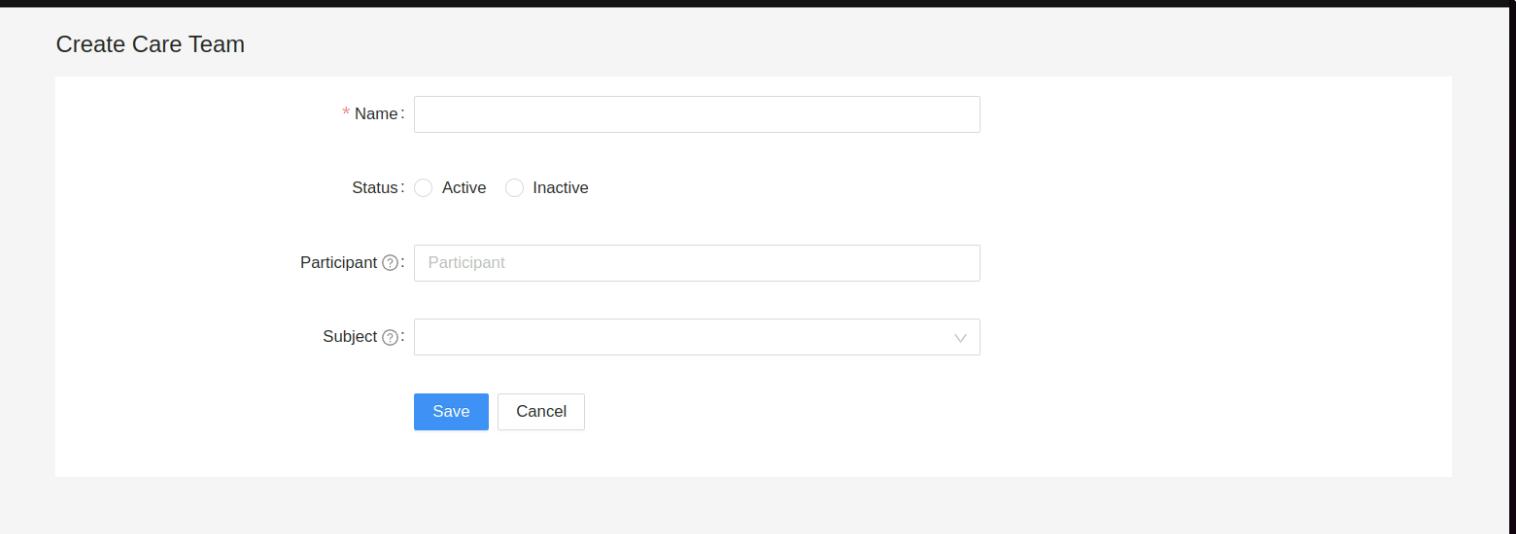
- To assign a Practitioner to that particular CareTeam, click on the ‘Participant’ field and select the practitioners.
- To assign a Group to that particular CareTeam, click on the ‘Subject’ field and select the groups.
- Click ‘Save'.
How to update Care Team’s detail
You can access this page by clicking on the CareTeam management menu on the sidebar. This will load a page with a list of existing CareTeam. Below is a sample of how the page would look like.
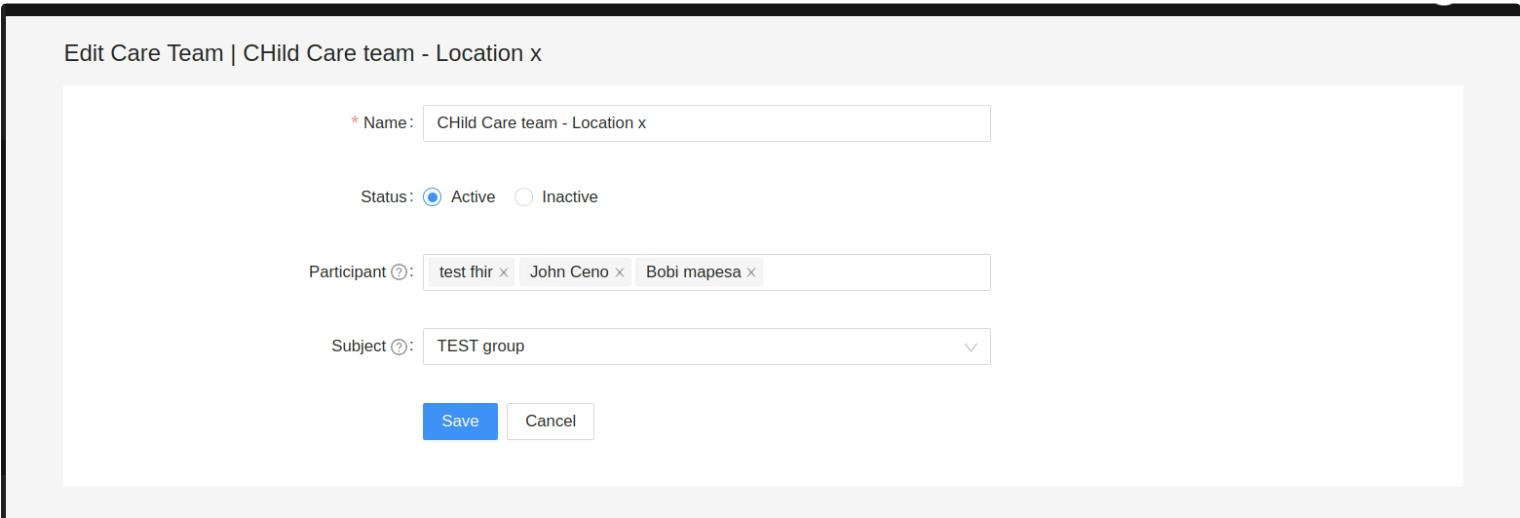
- Click on the ‘Edit’ link on the particular CareTeam you would like to update.

- This will load a form that allows you to update the CareTeam’s details. Fields with Asterisks are a must to fill.
- Click ‘Save.
Team Management
The FHIR web team(organization) management package provides the ability to perform the following functions.
- Creating teams (organization). a. Assign users to teams (organization).
- Assigning teams (organization) to locations.
Teams (organization) - This piece of functionality helps the users create teams (organization) to be used to administer the different services in the FHIR Core apps. This package also allows the different users to be added to the teams (organization).
Team assignment - This piece of functionality helps the users assign a location to the teams (organization).
Teams
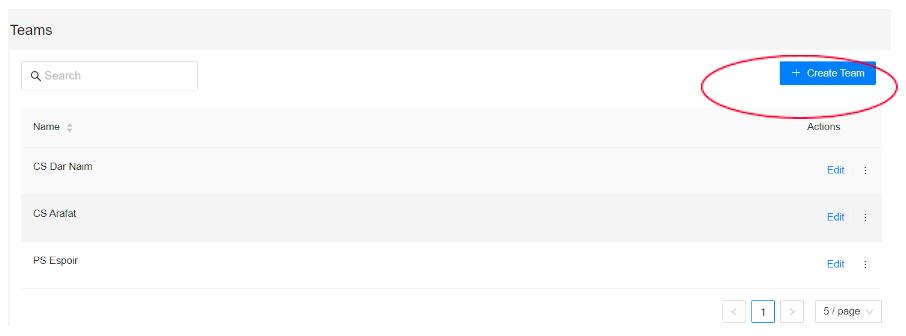
You can access this page by clicking on the team (organization) management menu on the sidebar then, clicking on the teams'(organization) menu. This will load a page with a list of existing Teams (organization). Below is a sample of how the page would look like.

- Click on the ‘Create Team’ button on the top right of the screen.
- This will load a form that allows you to enter the Team’s (organization) details. Fields with Asterisks are a must to fill.
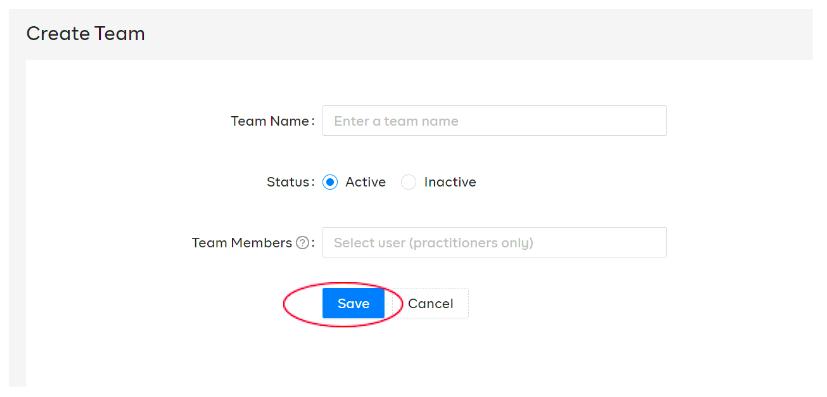
- To assign users to that particular team, click on the ‘Team Members’ field and select the users.
- Click ‘Save.
- To complete the Teams creation process, you will need to assign the team (organization) to a specific location as outlined in the next section.
How to update Team’s detail
You can access this page by clicking on the team(organization) management menu on the sidebar then, clicking on the teams' menu. This will load a page with a list of existing Teams. Below is a sample of how the page would look like.
- Click on the ‘Edit’ link on the particular Team you would like to update.
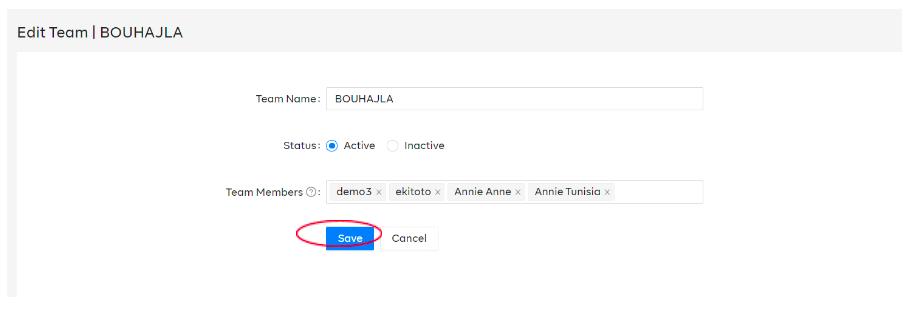
- This will load a form that allows you to update the team’s details. Fields with Asterisks are a must to fill.
- Click ‘Save.
Team (organization) Assignment
NB: Before proceeding with the steps below ensure you have locations uploaded in the system.
How to assign/ unassign Teams to locations You can access this page by clicking on the team(organization) management menu on the sidebar then, clicking on the team assignment menu. This will load a page with a list of existing locations. Below is a sample of how the page would look like.

- Search for the location on the search field, a list of results will appear, click on the preferred location from the results. The location will be updated on the section on the right.
- Click on the ‘Edit’ link, a page will appear as shown below that allows you to assign the teams. Select the preferred teams to assign to the location.
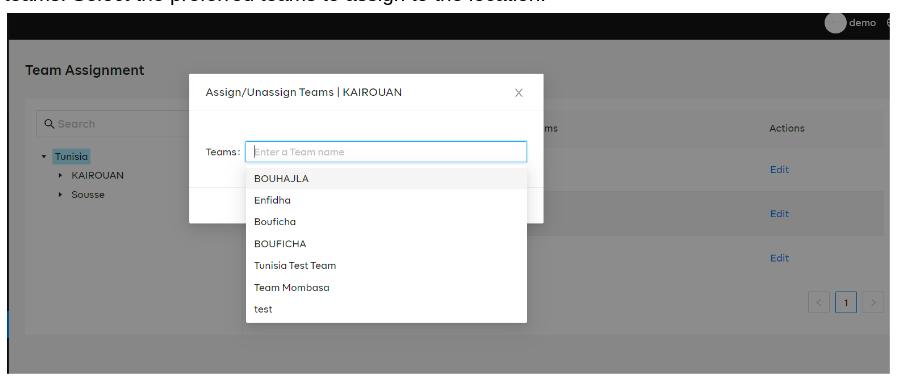
- To unassign a team from a location, follow the same process as on the above page click on the teams who would wish to remove.